So, how it works?
You just need to take easy steps to start using: create an account and download the client application, then run it on the rig.
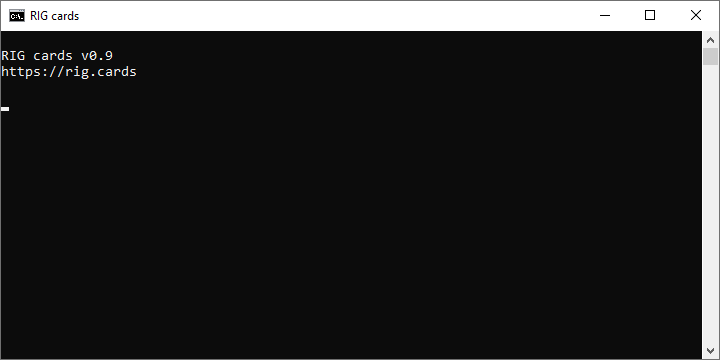
The client app is an open-source Windows PowerShell script (it's like an advanced .bat file), so you can easily check its contents if needed.
Next, you need to add a rig to your account, or it is possible to do it on the first launch of the client app. Choose rig name, set number of GPUs, and temperature limits if you wish.
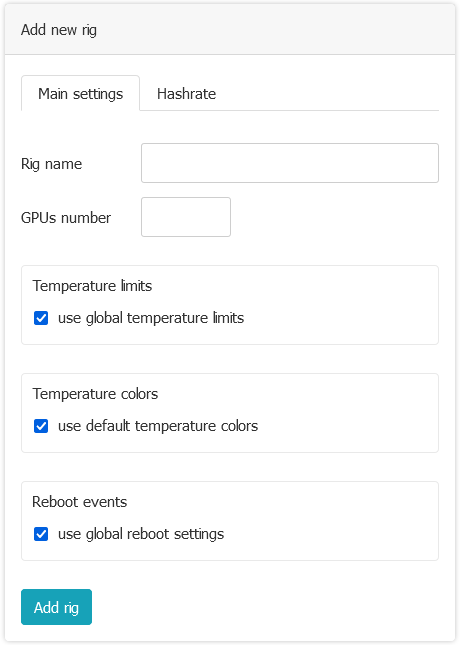
By the way, if you already added a rig to your account, you can download a pre-configured client for that rig and just launch it on the system.
To start the client application, you need to launch start_client.bat (you can put it to Windows startup as well).
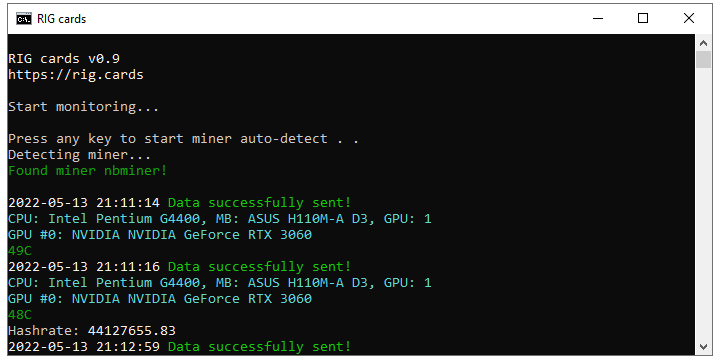
Every minute, the client sends data from rig to server (it does not touch your miners, just collects data from GPU sensors and does not affect the mining process).
If in 2 minutes period there are no data from the rig, it marks with a warning “yellow” Offline status. If still no activity from the rig in the next 2-3 minutes, the rig will be marked as “red” Offline status, and you'll get a notification about it.
In addition, each time when the server got data from the rig, we check the given parameters, and if something went wrong (for example overheating or loss of GPU) will also send a notification (of course if you enabled it), and the rig card will be marked with the corresponding icon.
Here is how different statuses look like:
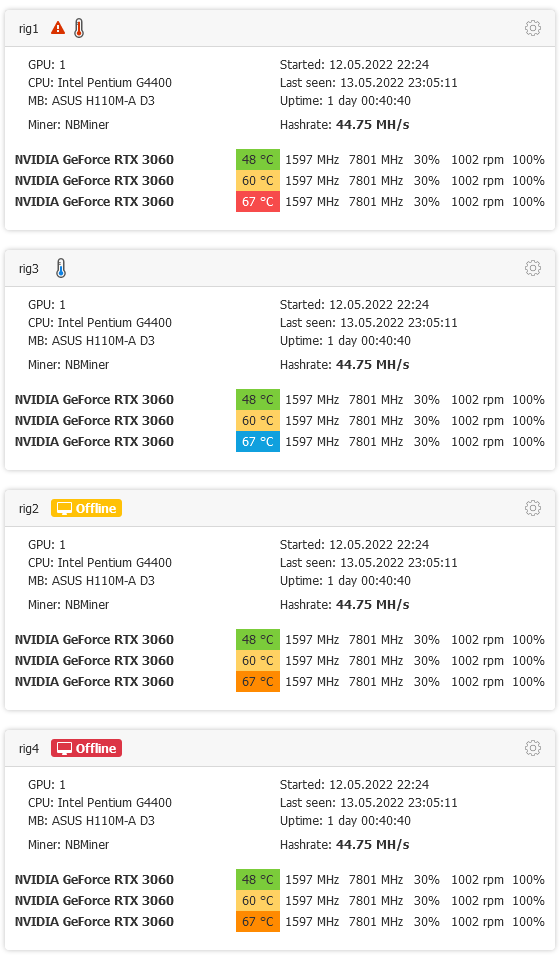
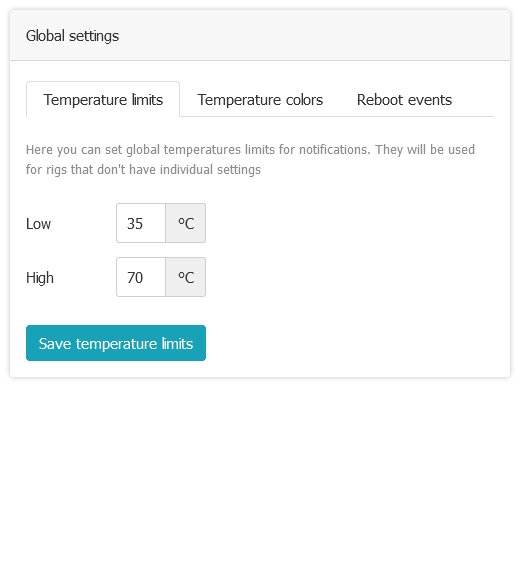
Temperature limits you can set globally for all rigs or each rig individually by clicking the cogwheel icon for the rig you need.
Depending on temperature levels, values will be colored, so just taking a look you can check is there everything is good with your rigs. You can set your own temperature ranges for each color. Again, for each rig separately, or for a group of rigs with Group Setting, or even with Global Settings for the account as a whole.
Here is also a nice trick with a low t° limit: in most cases, if something happens with the miner (unexpected close, can't connect to pool) GPU stop working and their temperatures go down. So if find the appropriate value you'll receive a notification of low temp, and it will mean that something is wrong with the mining process!
Rig settings, Group settings and Global setiings
-
Global settings – will be used if there are no individual settings for a specific rig.
-
Settings for the specified rig – it's settings for an exact rig and will be used only for it.
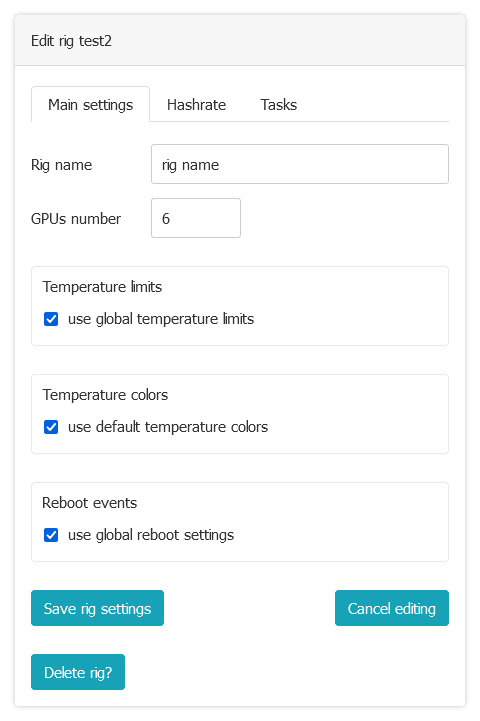
You can specify such settings both when adding a rig, and thereafter, simply by editing its settings with a click on the cogwheel icon.
-
Group Settings – there is also the possibility of group configuration of rigs.
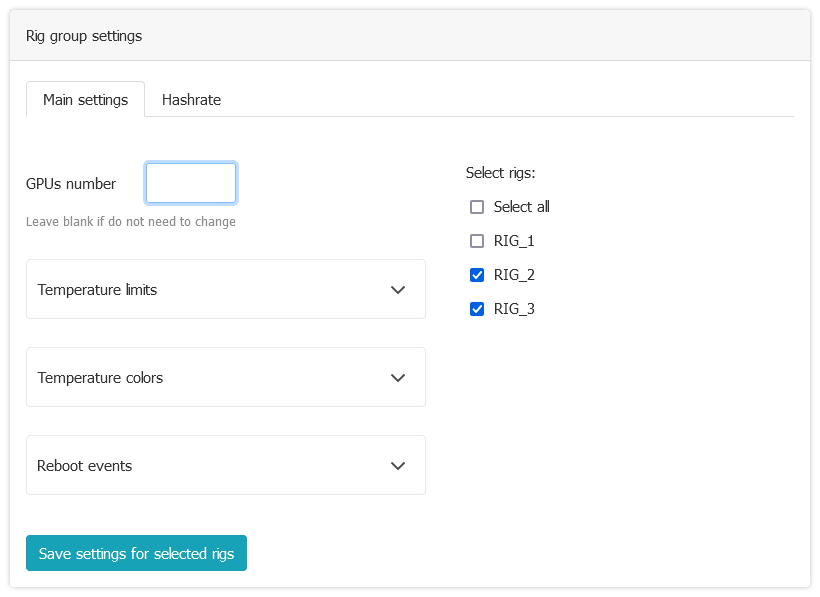
To achieve this, in the Group Settings, you need to select the desired rigs, set the settings, and they will be applied to each of the selected rigs!
Notifications and Telegram setup
You can receive various types of notifications by e-mail or Telegram messenger.
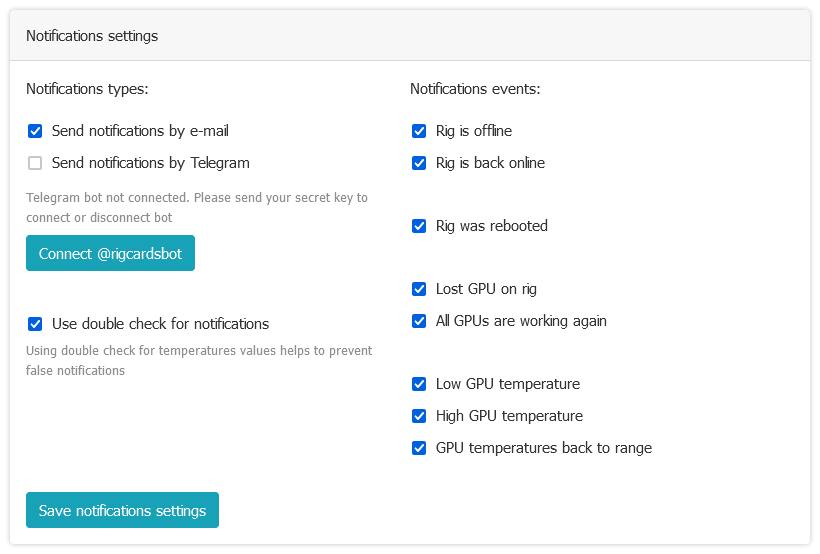
To activate notifications by Telegram, you need to use the bot: @rigcardsbot
To start, you just need to send your secret key to him. Key can be found at Account – Your profile – Profile – Secret key.
If everything is OK, you'll get a message that the bot is connected and ready to send alerts. That's all!
In case you want notifications to be received by some Telegram users at the same time, you can create a Group chat for such a purpose.
- Create a group chat in Telegram
- Add there people who also must receive notifications
- Also add to group our bot – @rigcardsbot
- Finally, send your secret key for the bot to set this group chat for notifications. For it, just send a message to the chat:
/secret your_secret_key_here
Done. The bot is connected and anyone in the group chat will receive notifications.
Temperatures double check
Double-checking is used to avoid false notifications for temperatures. This means you will get an alert only in case when the server gets from rigs out of range values twice in a row at least. This feature is enabled by default in your account, and it is possible to disable it in the Notification settings if you wish.
Hashrate monitoring
⚠️ Please note! The client app gets the hashrate value directly from the miner (not from the pool or somewhere else).
For hashrate displaying, you need to select in rig settings (on the Hashrate tab) the type of used miner, and also configure the miner itself on the rig to activate the API (usually, this can be done by editing the .bat file, and for some miners, the API is activated by default and nothing needs to do).
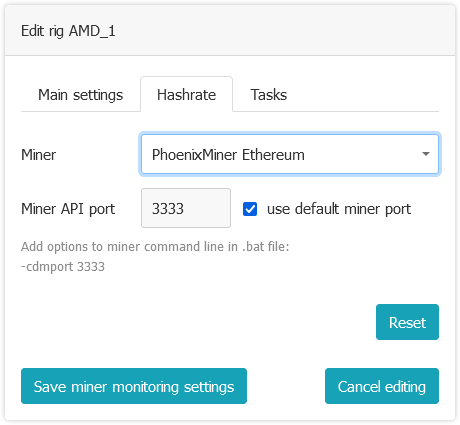
The client application has a function to auto-detect miners. At the start will be prompted to try automatically determine the miner. Of course, it will be working only in case when the miner's API is correctly configured and enabled.
For advanced users: you can set the miner API port manually if it is different from the default. Make attention that is not the port of the mining pool, but it is the port of the miner's API, check docs for the corresponding miner to get additional information.
Do not forget that rig connects to the server at time intervals, so when you change settings on the web, it may take some minutes before it is applied to the rig.
Below you can find examples of .bat files for supported miners to enable its API.
-
Claymore's Ethereum Miner
API enabled by default on port 3333, no action required. Anyway here is an example
EthDcrMiner64.exe -epool eu1.ethermine.org:4444 -ewal 0xD69af2A796A737A103F12d2f0BCC563a13900E6F -epsw x -mport -3333 -
PhoenixMiner Ethereum
API enabled by default on port 3333, no action required. Anyway here is an example
PhoenixMiner.exe -pool ssl://eu1.ethermine.org:5555 -pool2 ssl://us1.ethermine.org:5555 -wal 0x008c26f3a2Ca8bdC11e5891e0278c9436B6F5d1E.Rig001 -cdmport 3333 -
SRBMiner Cryptonight
SRBMiner-CN.exe --config Config\config-normalv4.txt --pools pools.txt --apienableor if not default port:
SRBMiner-CN.exe --config Config\config-normalv4.txt --pools pools.txt --apienable --apiport 21555 -
EWBF Equihash Miner
miner --algo 210_9 --pers AION0PoW --server cluster.aionpool.tech --port 3333 --user 0xa073ee72ea355f7856792ba6d8a2a37a18d37773539583ce508a2c1d7cd263be.test --api 0.0.0.0:42000 -
Ethminer
ethminer.exe --farm-recheck 2000 -U -P stratum1+tcp://0xD69af2A796A737A103F12d2f0BCC563a13900E6F.RIG_ID@eth.2miners.com:2020 --api-port -3333 -
TeamRedMiner
teamredminer.exe -a cnr -o stratum+tcp://pool.supportxmr.com:7777 -u 479c6JsyawEVAMNZU8GMmXgVPTxd1vdejR6vVpsm7z8y2AvP7C5hz2g5gfrqyffpvLPLYb2eUmmWA5yhRw5ANYyePX7SvLE -p x --api_listenor if not default port:
teamredminer.exe -a cnr -o stratum+tcp://pool.supportxmr.com:7777 -u 479c6JsyawEVAMNZU8GMmXgVPTxd1vdejR6vVpsm7z8y2AvP7C5hz2g5gfrqyffpvLPLYb2eUmmWA5yhRw5ANYyePX7SvLE -p x --api_listen=4028 -
T-Rex
API enabled by default on port 4067, no action required. Anyway here is an example
t-rex -a x16r -o stratum+tcp://rvn.2miners.com:6060 -u RBX1G6nYDMHVtyaZiQWySMZw1Bb2DEDpT8.rig0 -p x --api-bind-http 127.0.0.1:4067 -
NBMiner
API enabled by default on port 22333, no action required. Anyway here is an example
nbminer -a cuckaroo -o stratum+tcp://grin.sparkpool.com:6666 -u 2516768771@qq.com/default -long-format -log --api 127.0.0.1:22333 -
GMiner
miner.exe --algo grin29 --server grin.sparkpool.com --port 6666 --user admin@develsoftware.com/rig0 --api 80
Client application auto-update
The app has an auto-update function. It is also possible to use the client with auto-update disabled, for those who prefer to update manually.
To disable auto-update before downloading the client application you can check the “disable client autoupdate” checkbox.
Technically it just adds the "noautoupdate": 1 parameter to config.json file, so you can do it yourself as well.
{
    "rig_id": 00000,
    "user_id": 0000,
    "url": "https://rig.cards",
    "secret_key": "yoursecretkey",
    "noautoupdate": 1
}
Make attention that it works from client-side, not the server. And when auto-update is disabled, the app no more checks is there are new versions.
